Drawing with Miniworlds – Basics#
Foreword#
This tutorial is heavily inspired by the fantastic lecture notes by Prof. Dr. Michael Kipp: https://michaelkipp.de/processing/, which are based on Processing.
The Miniworlds version of Processing borrows several ideas and concepts but implements them in slightly different ways. In this tutorial, you’ll learn programming with Miniworlds using its Processing mode, which is modeled after the popular visual programming environment.
How Does Drawing Work on a Computer?#
Monitors consist of a grid of tiny squares. These are so small they appear as points to us. These tiny squares are called pixels.
Pixels are arranged in a coordinate system, which usually starts in the top-left corner:

Note
Computer scientists usually start counting at 0.
That means the top-left corner is (0, 0), and if the screen is 800×600 pixels, the bottom-right corner is (799, 599).
The First Program#
A Miniworlds program typically consists of the following parts:
from miniworlds import *
world = World()

# Your code here

world.run()
Line 1: Imports the Miniworlds library
Line 2: Creates the game world
Last line: Starts the main loop with
world.run()– this must always be the final line of your program
Everything in between can be your own code or comments.
Comments start with # and are ignored by the computer. They are written for humans to help understand the code.
Example:
from miniworlds import *

world = World()

Point((10, 10))

world.run()
You can also set the window size by passing width and height to World:
from miniworlds import *

world = World(200, 400)
world.run()
Drawing Basic Shapes#
Lines#
Syntax:
Line(startpoint, endpoint)
Both startpoint and endpoint are tuples, e.g., (1, 2).
Draw a line from (10, 10) to (100, 200):
from miniworlds import *

world = World()
Line((10, 10), (100, 200))
world.run()

Circles#
Circle(position, radius)
Note
The position refers to the center of the circle.
Example:
from miniworlds import *

world = World()
Circle((100, 200), 20)
world.run()

Rectangles#
Rectangle(position, width, height)
positionis the center corner of the rectangle
Example:
from miniworlds import *

world = World()
Rectangle((100, 100), 20, 100)
world.run()

It is often easier to draw a rectangle starting from the top-left position. You can do this with the method from_center:
Rectangle.from_center((100, 100), 20, 100)
Ellipses#
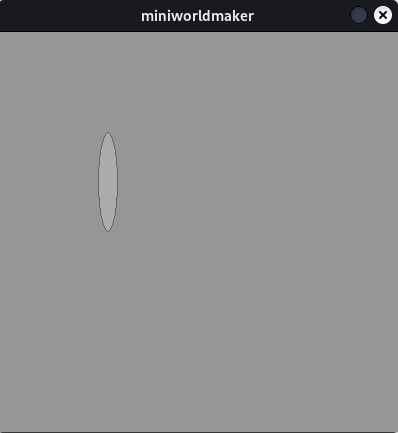
Ellipse(position, width, height)
Like rectangles, but the shape is oval and fits inside the given rectangle.
Example:
from miniworlds import *

world = World()
Ellipse((100, 100), 20, 100)
world.run()

Centered Rectangles and Ellipses#
1. from_center#
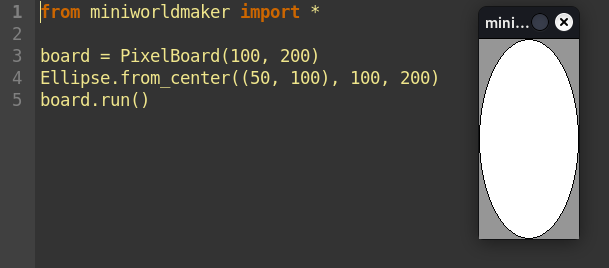
Use .from_center() to draw an ellipse centered on a point:
from miniworlds import *

world = World()
Ellipse.from_center((50, 100), 100, 200)
world.run()

2. Using .center#
You can manually center an ellipse like this:
from miniworlds import *

world = World()
ellipse = Ellipse((0, 0), 100, 200)
ellipse.center = (50, 100)
world.run()
More Complex Shapes#
Arcs#
Arc(position, width, height, start_angle, end_angle)
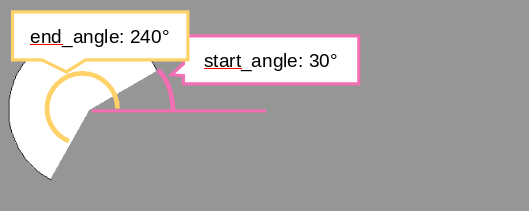
position: center of bounding boxwidthandheight: ellipse sizestart_angle,end_angle: angles in degrees, counterclockwise from the right

Example:
from miniworlds import *

world = World()
Arc.from_center((200, 200), 200, 200, 30, 242)
world.run()
Triangle#
Triangle(p1, p2, p3)
Each point is a tuple like (x, y).
Example:
from miniworlds import *

world = World()
Triangle((10, 10), (100, 100), (200, 10))
world.run()
Polygon#
Polygon(pointlist)
pointlist is a list of tuples.
For example, a triangle as a polygon:
from miniworlds import *

world = World()
Polygon([(10, 10), (100, 100), (200, 10)])
world.run()
🧠 Training Exercises#
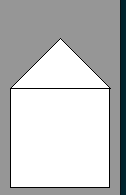
Exercise 1.1 – House with Shapes#
Draw a house using basic shapes:

Solution hint
from miniworlds import *

world = World()
world.size = (120, 210)
Rectangle((10, 100), 100, 100)
Triangle((10, 100), (60, 50), (110, 100))

world.run()
Exercise 1.2 – Face#
Draw a face using basic shapes:

Solution hint
from miniworlds import *
import random

world = World()
world.size = (100, 100)

Circle.from_center((50, 50), 50)
Arc.from_center((50, 80), 40, 20, 180, 360)
Circle.from_center((30, 30), 10)
Circle.from_center((70, 30), 10)
Line((50, 50), (50, 70))

world.run()